LeAnna’s Nail Polish Tips
It’s no secret that I love doing my nails and ALWAYS wear nail polish. However, I can’t bring myself to pay salon prices for perfect nails. Lately I have been getting more and more compliments on my nails (especially when I wear this color), and people are surprised to hear I do them myself! So, here are my tips and how I accomplish pretty nails that last from home 💅🏻
View My Video Here 👇
It’s All About The Prep!
One of the most important things I’ve learned is the importance of preparing your nail so that nail polish adheres well and lasts! Yes, it takes time. But so do most things if you want good results. My nail prep includes pushing back cuticles, filing, and buffing.
1) Cuticles
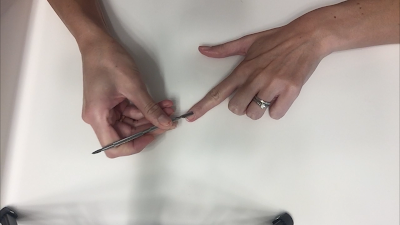
I use a tool like this to push back my cuticles and scrape off any old nail polish that the remover hasn’t taken off from my nail.
This creates a flat surface for the nail polish to go. If you don’t push your cuticles back and polish dries on them, it doesn’t stick like it does directly to your nail bed. This creates a weak area and your nail polish will start peeling off right away and not last.
2)Filing
I use a glass file like this to shape my nails before I paint them. It is important to file the nails before painting them (not after). Filing after is likely to take paint off and the rest of the polish may start peeling off the nail as well.
I start by rounding the corners of my nails.
Then I round the top of my nail (filing in one direction only) to the length I want.
3) Buffing
This is what smooths your nails out and creates a nice texture for nail polish to really stick to and stay. I have nails that peel a lot, so I sand off the peeling part before I paint my nails. Nail polish sticks to the outer most layer of the nail. So, if the top layer of the nail begins to peel, the polish comes off with it. And once it starts peeling, it doesn’t stop. Here is a buffer like the one I use.
I buff back and forth between the bottom and top of my nail paying close attention to ensure any part that is already peeling is buffed off to create a smooth surface.
Time To Paint!
I use Sally Hansen Miracle Gel. This is an awesome polish that gives gel quality nails without the use of a special light. This polish cures with natural light which is awesome! It’s a 2 step process. The first layer is the color and then you place the gel top coat over that. I find this nail polish very easy to use and it lasts a long time! The color I’m using is “Red-y, Set, Run!” It has a little sparkle in it and turns out to be the perfect shade of red.
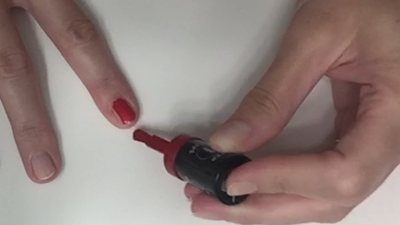
When I start with the color I place the brush in the middle of my nail and push it down toward my cuticle.
Then I drag the brush up in one fast sweeping motion to the tip of my nail, making sure the polish make sit all the way to the top of my nail.
Then I fill in the sides by starting just above the cuticle, pushing down towards the cuticle and dragging the brush up the the top of my nail. It takes about 3 strokes to cover my nail, and then I do a few more to ensure my entire nail is coated.
I start with painting my dominant hand because it is difficult to paint with my left hand and I don’t want to deal with wet nail polish on that hand on top of it. I have tried different things over the years and discovered how to hold the brush with my non-dominant hand to give me the most control. I place my middle finger on one side and my thumb on the other and squeeze. Then I place my pointer finger on the very top of the brush.
Once I am done with the first coat, I let it dry for 2-5 minutes. Then I start the second coat! It is important to do 2 coats of color.
On the second coat, I drag the brush from my cuticle to the tip of my nail over the polish that has already been applied. The goal of the second coat is to reinforce the color and ensure that there are no uncovered areas. I let this dry for 5-10 minutes before applying the top coat!
The Sally Hansen Miracle Gel Top Coat is what really ties everything together, adds shine, and keeps your nail polish from chipping! I paint this from the cuticle to the top of the nail, ensuring all of the color is covered.
I also “seal” the tips of my nails by dragging the brush over the very tip of my nails to ensure the polish wraps all the way around. This prevents chipping on the tips.
I then let this dry for 30 minutes or more before touching my nails.
As you can see, my nails do not look perfect at this stage, I am not that great at precision and nail polish always ends up on the skin surrounding my nails. Luckily, I found a way to remove this without ruining my nails!
I run warm water over my nails for a few minutes and then use a wash cloth to buff away any paint on my skin. The easiest way to do this is in the shower after you have been in the warm water for a while. However, the sink works too!
Then my nails look like I just went to the salon!
That is how I do my nails! Sally Hansen claims to give you up to 2 weeks of chip free nails. However, I find that 1 week is more realistic. It really depends on how much you use your hands. I am a nurse and use my hands A TON and frequently use hand sanitizer. I have found that hand sanitizer removes the top layer of nail polish. So, I will try to reapply a top layer between shifts. When I don’t reapply, my nails start to chip after 3-5 days.
However, when I take it easy on my nails, my nail polish will last about a week before it starts chipping. What’s nice is that when it does chip, the chips seem to be smaller and not grow compared to other nail polishes.
Here are the links to everything I used 😊
Sally Hansen Miracle Gel Color “Red-y, Set, Run!”
Sally Hansen Miracle Gel Top Coat
Cuticle Tool
Glass Nail File
Nail Buffer
Associate disclosure: As an Amazon Associate I earn commission from qualifying purchases made using links I post.


Comments
Post a Comment